
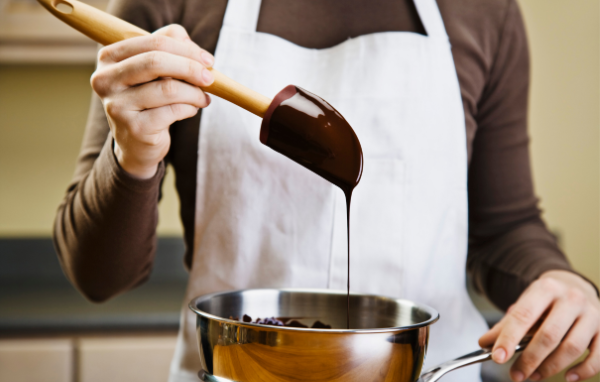
Tempering chocolate is an essential technique for anyone looking to create professional-quality chocolate treats at home. Knowing how to temper chocolate at home involves a precise process of heating and cooling chocolate to create a stable and glossy finish when it sets. This process ensures that the final product has a smooth texture and a satisfying snap, making it ideal for various chocolate creations, such as dipping fruits, molding chocolates, and decorating desserts.
Learning to temper chocolate at home may seem intimidating at first, but with a little practice and the right tools, it’s entirely achievable. The process can be done using either a double boiler or a microwave. It is crucial to follow temperature guidelines and use properly chopped chocolate to achieve the best results. The following guide will provide helpful information on the steps involved in tempering chocolate successfully in the comfort of your own home.
Understanding Chocolate Tempering
Chocolate tempering is an essential process when working with chocolate to achieve a glossy, streak-free finish. Tempered chocolate has a high-quality appearance and is often used in making candies, chocolate-dipped fruits, and various confections.
At the heart of tempering is the meticulous management of the cocoa butter’s fat crystals found within the chocolate. In its natural state, chocolate contains different types of fat crystals that affect its final texture and appearance. Proper tempering aligns these crystals, giving the chocolate a shiny, smooth surface and a satisfying snap to it.
To begin, we must melt the chocolate in a controlled manner. This can be done using a double boiler or in the microwave. The goal is to not overheat the chocolate, as it can cause the crystals to form undesirably. For dark chocolate, aim for a temperature of 122°F (50°C), while milk and white chocolate should be heated to around 105°F (40°C).
Once the chocolate reaches the desired temperature, cooling and agitation begin. Cooling can be done by tabling, which involves spreading a portion of the melted chocolate onto a clean, dry marble slab and using a metal spatula to move it back and forth. Alternatively, you can simply add finely chopped chocolate pieces to the melted batch in the bowl, stirring until the added chocolate is melted and the temperature drops.
Tempering chocolate requires constant attention to temperature and a gentle approach. It’s essential to ensure that your tools and workspace are clean and dry, as any moisture can cause the chocolate to seize and ruin the tempering process.
By using this skillful technique, bakers and chocolatiers can elevate their confections and produce visually stunning chocolate treats that delight the eyes and taste buds of their consumers.
Types of Chocolate to Temper
When it comes to tempering chocolate, there are three main types to consider: dark chocolate, milk chocolate, and white chocolate. Each type has differing levels of cocoa butter and sugar content, which will significantly impact the tempering process.
Dark chocolate contains the highest percentage of cocoa solids and cocoa butter, usually ranging from 50% to 90%. It is characterized by its strong, rich flavor and slightly bitter taste.
Milk chocolate, on the other hand, has a more mild and creamy flavor. It contains lower levels of cocoa solids and cocoa butter, typically ranging from 30% to 50%. The addition of milk powder or condensed milk gives milk chocolate its signature sweetness and smooth texture.
White chocolate is different from dark and milk chocolate, as it does not contain any cocoa solids. This gives it a distinctive ivory color and velvety, sweet flavor. The primary components of white chocolate are cocoa butter, sugar, and milk solids. Even though it deviates from the traditional cocoa solid formula, white chocolate can still be successfully tempered, thanks to the cocoa butter content.
When selecting the appropriate chocolate for tempering, it is crucial to pay attention to the percentage of cocoa butter present. The higher the percentage, the better the chocolate will perform in the tempering process. High-quality chocolate bars, wafers, or callets (small, uniform chocolate pieces) from reputable brands are recommended for tempering, ensuring a smooth, professional finish in your homemade creations.
Tools and Equipment Needed
Tempering chocolate at home requires a few essential tools and equipment that can be easily found in your kitchen or purchased from a store. These items will ensure that the process is accurate and efficient, providing consistent results for chocolate confections.
A microwave or double boiler are typically used to melt the chocolate before tempering. Microwaves offer a quick and easy approach for melting chocolate, heating initially in 30-second intervals on high power and as the chocolate melts, reducing to 15, 10 and 5-second intervals. Careful monitoring is essential to avoid overheating the chocolate. A double boiler, which consists of a pan, a large bowl, and a stove, offers a more controlled method for melting chocolate. The chocolate is placed in a metal or glass bowl that sits atop a pan filled with simmering water, allowing even and gentle heat distribution.
A rubber spatula is an essential tool when working with chocolate. It helps mix the chocolate throughout the melting process and evenly distributes residual heat during the cooling stage of tempering. It’s also useful for scraping every bit of chocolate off the sides of the bowl.
A digital thermometer or candy thermometer plays a crucial role in ensuring accurate temperature readings during the tempering process. These thermometers provide instant and accurate temperature readings, taking the guesswork out of the process. An instant-read thermometer is another excellent choice for quickly gauging chocolate’s temperature.
A metal spatula, often called an offset spatula or bench scraper, is a valuable tool for chocolate-making enthusiasts. When used on a cool surface, such as a marble slab, a metal spatula helps in the process of tabling, a technique for cooling and agitating tempered chocolate to achieve the desired texture and consistency. While this method is optional for home tempering, skilled chocolatiers regularly employ intricate techniques with metal spatulas.
Lastly, a stove is necessary for the double boiler method, or a microwave, providing a heat source to melt the chocolate gradually. Ensuring a low and steady heat setting is crucial to prevent chocolate from burning or seizing.
With these essential tools and equipment, home cooks can confidently and effectively temper chocolate, producing professional-quality chocolate treats that delight the senses.
Chocolate Tempering Techniques
Chocolate tempering is a process to achieve a glossy, smooth, and consistent finish on chocolate confections. It involves carefully heating and cooling the chocolate in a controlled manner to develop the proper crystalline structure. Here are some popular techniques for tempering chocolate at home.
Melting and cooling: The first step in chocolate tempering is melting the chocolate – two-thirds of the chocolate you have if you are seeding, and all of it if you are tabling. This should be done slowly and gently using a double boiler or a microwave, making sure to not overheat the chocolate. Once melted, it is essential to cool the chocolate down to a certain temperature before reheating it. For dark chocolate, the ideal temperature is around 90°F (32°C), while milk and white chocolates should be slightly lower, around 86°F (30°C). This process forms the right cocoa butter crystals in the chocolate.
Seeding: The seeding technique involves adding the remaining one-third of your chocolate. Add small, finely chopped pieces (or callets) of already tempered chocolate (called “seeds”) to the melted chocolate. The seeds help to initiate the proper crystallization process when the tempered chocolate is stirred into the melted chocolate. As the chocolate cools, it should be stirred continuously to encourage even crystal formation.
Tabling: Tabling is another method to achieve the desired chocolate temper. Melt the chocolate to 122°F/50°C for dark or 105°F/40°C for milk or white chocolate in a double boiler. Then, pour two-thirds of the melted chocolate onto a clean, dry marble slab. Using a metal spatula, spread the chocolate back and forth until it thickens or use a thermometer to check the temperature, dark chocolate at 89°F/32°C and milk or white chocolate at 86°F/30°C, then return to the bowl with the remaining one-third and mix well. Use immediately, or maintain temperature. Once the proper consistency is reached, the chocolate is ready to be used for dipping or molding.
Heating and cooling: For a tempered chocolate that holds its shape at room temperature, it is essential to reheat the cooled chocolate to a precise temperature. Reheat the dark chocolate to 89°F/32°C and milk or white chocolate to 86°F/30°C. This step will ensure a proper temper while maintaining the chocolate’s workable texture.
By following these techniques, you can achieve a beautifully tempered and shiny chocolate finish for homemade confections. Remember to work with precision and patience to enjoy the perfect results.
Step-by-Step Guide for Tempering Chocolate
To achieve perfectly tempered chocolate with a smooth texture, glossy finish, and satisfying snap, follow these simple steps:
Step 1
Chop the chocolate (or use callets): Begin by chopping your chocolate into even pieces, no larger than a 1/2-inch square. Use about 400g of good-quality chocolate for best results.
Step 2
Melt the chocolate: There are two common methods for melting chocolate: the double boiler and the microwave method. For the double boiler, fill a saucepan one-third full with water and place a stainless steel bowl on top, ensuring the bowl does not touch the water. Heat the water to a gentle simmer, then place two-thirds of the chocolate in the bowl, stirring it occasionally to ensure even melting. Alternatively, you can use the microwave, placing the chopped chocolate in a microwave-safe plastic bowl and microwaving on high power initially in 30-second intervals as the chocolate melts, reducing to 15,10 & 5-second intervals the nearer you get to the temperature. Keep mixing being careful not to overheat.
Step 3
Monitor the temperature: Keep an eye on the temperature of the chocolate, aiming for 113°F/45°C. Use a kitchen thermometer to ensure accuracy.
Step 4
Add unmelted chocolate to the mixture: Once the melted chocolate reaches the appropriate temperature, remove it from the heat source and add the remaining one-third of chopped or callets, unmelted chocolate. Stir to melt the unmelted chocolate, which will help in forming the desirable beta crystals.
Step 5
Cool the chocolate while stirring: Continue stirring the chocolate while allowing it to cool. This process helps promote homogenous crystallization and ensures a smooth, glossy finish. Bring dark chocolate down to 89°F/32°C and milk or white chocolate down to 86°F/30°C. This process helps create the correct crystal structure for tempered chocolate.
Step 6
Test for temper: To confirm that your chocolate is properly tempered, dip a metal spatula or the edge of a knife into the chocolate and let it sit for a few minutes in a cool area. If the chocolate sets with a glossy, smooth appearance and a crisp snap, it’s properly tempered.
Step 6
Maintain the working temperature: Ensure that the tempered chocolate does not go above or below the working temperature, as this will result in either lumps or dull-looking chocolate. Reheat or cool as needed.
Now you’re ready to use your tempered chocolate! Ideal for truffles, chocolate bonbons, chocolate-covered fruit, and various pastry applications, tempered chocolate is a key skill in candy-making. Remember that adding even the tiniest drop of water or other liquid can cause the chocolate to seize up due to the milk solids. In addition, be aware that using a tempering machine or continuous agitation might produce slightly different results.
FAQ
What is chocolate tempering, and why is it important?
What are the different types of chocolate that can be tempered?
What tools and equipment do I need to temper chocolate at home?
Can I use a microwave to melt chocolate for tempering?
How do I cool the melted chocolate to the right temperature for tempering?
What is the seeding technique, and how does it help in tempering chocolate?
What is tabling, and how can it be used to temper chocolate?
What temperatures should I aim for when tempering dark, milk, and white chocolate?
How do I test if the chocolate is properly tempered?
How do I maintain the working temperature of tempered chocolate?
What are some common mistakes to avoid when tempering chocolate at home?
Can I use tempered chocolate for different chocolate treats and confections?
Can I temper chocolate without a candy thermometer?
How long does it take to temper chocolate?
Can I re-temper chocolate if it cools down too much during the process?
Conclusion
Tempering chocolate at home is a skill that can be learned with practice and the right techniques. By understanding the process of tempering and following the step-by-step guide, you can achieve professional-quality results in your homemade chocolate creations. The key to successful tempering lies in precise temperature control, proper cooling and agitation, and using high-quality chocolate with the right cocoa butter content. With the necessary tools and equipment, such as a microwave or double boiler, a thermometer, and a spatula, you can confidently temper chocolate and enjoy its glossy finish, smooth texture, and satisfying snap. Whether you’re making candies, chocolate-dipped fruits, or decorating desserts, tempered chocolate will elevate your confections and impress your friends and family. So take the plunge, experiment with different chocolate types, and indulge in the art of tempering chocolate at home.