
Learn how to achieve perfectly tempered chocolate with this comprehensive guide. Understand the signs of well-tempered chocolate, avoid common tempering mistakes, and explore the versatile uses of properly tempered chocolate. From texture and appearance to temperature control and tools, this article covers all the essential aspects of chocolate tempering, empowering you to create irresistible homemade chocolate treats.
Signs of Properly Tempered Chocolate
Properly tempered chocolate is essential for creating professional-looking and delicious chocolate treats at home. Recognizing the signs of well-tempered chocolate ensures a successful outcome.
The ideal texture of tempered chocolate and how it affects your chocolate creations.
One of the first indicators of correctly tempered chocolate is its texture. A smooth and velvety texture is ideal, with no lumps or grittiness. When the chocolate is tempered, it should have a silky consistency that is easy to work with at the right working temperature.
The importance of working temperature and how it contributes to successful chocolate tempering.
The working temperature is another vital factor in chocolate tempering. For dark chocolate, the ideal temperature is around 90°F (32°C), while milk and white chocolates should be slightly lower, around 86°F (30°C). Maintaining these temperatures while working with the chocolate is crucial.
A glossy appearance signifies proper tempering and enhances the overall appeal of your chocolate treats.
The appearance of tempered chocolate is also essential. A glossy finish indicates successful tempering, which contributes to the chocolate’s overall appeal. When set, tempered chocolate should not have any gray or dull spots, as these can signify improper tempering or unmelted cocoa butter crystals.
Maintaining proper temperatures during tempering is made easier using a double boiler setup with simmering water. Making sure the water is not too hot and not having direct contact with the chocolate will prevent scorching and ensure a silky consistency.
Some techniques for tempering chocolate involve using a marble slab. Using a marble slab ensures rapid and even cooling, which is necessary for achieving tempering. The marble slab method helps produce the ideal glossy finish and smooth texture.
Finally, before starting the tempering process, it is crucial to finely chop the chocolate. This ensures even and quick melting, which contributes to the overall success of tempering.
By paying attention to these signs and following the proper tempering techniques, you can achieve beautifully tempered chocolate with a soft, glossy finish, ideal for any homemade chocolate creation.
Common Tempering Mistakes and Solutions
Tempering chocolate at home can be a rewarding process, but it is not without its pitfalls. Below are some common mistakes and their solutions to help you achieve perfectly tempered chocolate every time.
Prevent your chocolate from seizing due to moisture and create smooth, grain-free chocolate.
One of the most frequent mistakes when tempering chocolate is letting the chocolate get wet or allowing the tiniest drop of water to come in contact with the chocolate. Humidity, condensation, or even damp utensils can cause the chocolate to seize and become thick, dull, and grainy. To avoid this, ensure all equipment is completely dry and avoid working in a humid environment.
Types of chocolate are best suited for tempering and why some varieties may not yield optimal results.
Another issue is the type of chocolate used for tempering. Baking chocolate chips, typically used in making cookies, might not be suitable for tempering, as they usually contain added ingredients such as sugar and vegetable fats, which affect the tempering process. It is best to use couverture semisweet or bittersweet chocolate with a high cocoa content for tempering.
Avoid scorching your chocolate and learn how to maintain the recommended temperature range for successful tempering.
Overheating is another common mistake. Chocolate can easily scorch when melted at high temperatures, leading to a burnt or bitter taste. To avoid this, heat the chocolate slowly and gently, ensuring the temperature stays within the recommended range for the specific type of chocolate being used.
Find solutions to achieve the desired glossy finish and satisfying snap in your tempered chocolate.
Not achieving the desired glossy finish and snap can be disappointing. This might be due to the chocolate not being cooled or heated to the right temperatures during the tempering process. Make sure to follow the correct tempering methods below.
Avoiding gray or dull spots in tempered chocolate with continuous stirring during the tempering process
Streaky or dull chocolate is another outcome of improper tempering. This can be caused by not stirring continuously during the heating and cooling process, leading to unevenly distributed cocoa butter crystals. Keep stirring the chocolate throughout the process to ensure a smooth, well-tempered result.
The importance of ensuring dryness and correct temperature when dipping items into tempered chocolate.
When dipping items such as fruits or cookies into tempered chocolate, make sure they are dry, as moisture can compromise the chocolate’s appearance and texture. Additionally, be cautious by dipping items only after the tempered chocolate has reached the correct temperature, or else it might result in an uneven and unappealing finish.
By paying attention to these common pitfalls and their solutions, you can successfully temper chocolate at home and enjoy the process. Practice makes perfect, so don’t be discouraged if your initial attempts are not perfect. Keep experimenting and refining your technique to master the art of chocolate tempering.
Uses for Tempered Chocolate
Tempered chocolate is essential for creating professional-quality chocolate treats at home. When chocolate is properly tempered, it has a shiny appearance, smooth texture, and a satisfying snap when broken or bitten.
Properly tempered chocolate prevents bloom and maintains the desired qualities of your chocolate creations.
One common issue when working with untempered or improperly tempered chocolate is bloom. Bloom occurs when the cocoa butter in the chocolate separates and rises to the surface, resulting in a white, powdery appearance and a crumbly texture. Properly tempering chocolate can help prevent bloom and maintain the desired qualities of the chocolate.
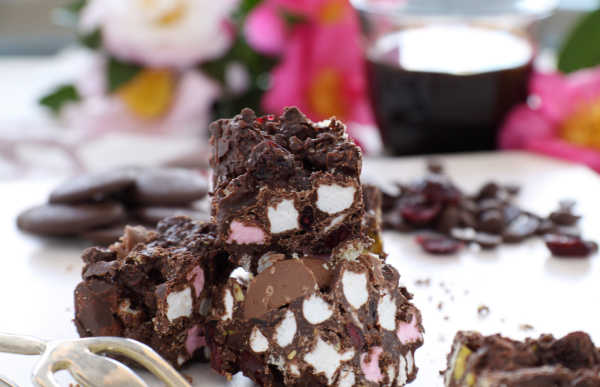
How to make rocky road bark with tempered chocolate, marshmallows, and nuts, and enjoy its shiny finish and firm texture.
A popular treat made with tempered chocolate is rocky road bark. To make this delicious snack, simply melt and temper your preferred chocolate, and then mix it with marshmallows and nuts before spreading it on a lined baking sheet to cool and set. The tempered chocolate ensures that the bark will have a shiny finish and a firm texture.
Key tools needed for successful chocolate tempering, include a candy thermometer and a spatula.
When tempering chocolate at home, it’s important to have the right tools. A candy thermometer is essential for accurately measuring the temperature of the chocolate throughout the tempering process. This ensures that the chocolate reaches the proper temperature to form stable cocoa butter crystals, which are necessary for achieving the desired texture and appearance.
Another helpful tool for working with tempered chocolate is a spatula. These can be used to spread the chocolate evenly over a marble slab or other cool surface during the tempering process. This step, called “tabling,” helps the chocolate form the necessary stable cocoa butter molecules and cools the chocolate evenly.
Overall, tempered chocolate can be used to make a wide variety of treats, such as dipped fruits, filled chocolates, or even intricate chocolate decorations. Its shiny, firm finish and smooth texture makes it a versatile ingredient, adding elegance and flair to your homemade creations.
What are the steps to temper chocolate at home?
Step 1
Chop the chocolate into small, even pieces and place two-thirds of the chocolate in a stainless steel bowl if using a double boiler, a plastic bowl if using a microwave. Glass bowls retain heat and you need to control the temperature.
Step 2
Prepare a double boiler by filling a saucepan one-third full with water, bringing it to a gentle simmer.
Step 3
Place the bowl of chocolate over the saucepan and melt the chocolate to 122°F/50°C for dark or 105°F/40°C for milk or white chocolate. Alternatively, if using a microwave, heat initially in 30-second intervals on high power and as the chocolate melts, reducing to 15,10 & 5-second intervals the nearer you get to temperature. Keep mixing so that there are no hotspots.
Step 5
To check that your chocolate is properly tempered, dip a metal spatula or the edge of a knife into the chocolate and let it sit for a few minutes in a cool area. If the chocolate sets with a glossy, smooth appearance and a crisp snap, it’s properly tempered.
Step 6
Ensure that the tempered chocolate does not go above or below the working temperature, as this will result in either lumps or dull-looking chocolate.
FAQ
Can I temper chocolate without a thermometer?
What type of chocolate should I use for tempering?
Can chocolate chips be used for tempering?
How do I make chocolate set hard?
Do I need special equipment for chocolate tempering?
Conclusion
Become a master of chocolate tempering by recognizing the signs of properly tempered chocolate, avoiding common mistakes, and understanding the various uses of tempered chocolate. With this comprehensive guide, you’ll be able to create professional-quality chocolate treats at home, delighting friends and family with your skill and expertise.